


★★★★★
Trần Minh Khang – Đà Nẵng: Soi kèo sợ nhất là web lag. Từ ngày biết keonhacai55.fund, mình nắm chắc mọi biến động nhờ bảng kèo trực tuyến cập nhật theo từng giây. Dữ liệu nhảy real-time giúp mình tự tin.


Kèo nhà cái hôm nay cập nhật tỷ lệ kèo bóng đá trực tuyến nhanh nhất bảng kèo châu Á, tài xỉu, châu Âu tự động làm mới theo thời gian thực, phủ hơn 200 giải đấu từ Ngoại Hạng Anh, La Liga, Champions League đến V-League. Không chỉ là nơi xem tỷ lệ kèo nhà cái 5, chuyên trang còn cung cấp nhận định soi kèo chuyên sâu giúp bạn đọc kèo chuẩn, nhận ra bẫy nhà cái và chọn cửa cược tối ưu trước mỗi trận đấu.
https://areacellphone.com/ cập nhật lịch thi đấu, bảng xếp hạng và kết quả bóng đá liên tục 24/7. Bên cạnh đó, hệ thống còn hỗ trợ người dùng tổng hợp dữ liệu cần thiết để soi kèo, so sánh tỷ lệ nhà cái và đánh giá trận đấu khách quan hơn.


Kèo nhà cái (keonhacai) là website có hệ thống dữ liệu bóng đá trực tuyến hàng đầu, vận hành liên tục 24/7. Dù chỉ mới ra mắt từ năm 2024, nền tảng đã khẳng định vị thế khi thu hút hơn 2 triệu lượt truy cập tại thị trường Việt Nam. Mọi thông số từ biến động kèo nhà cái 5 cho đến lịch trình thi đấu đều được xử lý nghiêm ngặt qua bộ lọc chuyên gia, mang đến cái nhìn toàn diện và chuẩn xác nhất cho mọi tín đồ tìm kiếm keonhacai uy tín. Không dừng ở việc cung cấp thông tin, chuyên trang còn phát sóng trực tiếp bóng đá hôm nay với hàng trăm trận đấu mỗi ngày từ các giải lớn nhỏ trên toàn cầu. Hệ thống đường truyền ổn định đảm bảo hình ảnh sắc nét, hạn chế giật lag trong suốt thời gian diễn ra. Âm thanh rõ ràng kết hợp với bình luận tiếng Việt tạo trải nghiệm chân thực cho từng pha bóng.

Kèo nhà cái được tạo ra với mong muốn trở thành một điểm đến cung cấp các thông tin chất lượng cho người dùng yêu cá độ bóng đá online. Vì vậy, mỗi bước đi đều gắn liền với sứ mệnh và mục tiêu lâu dài về việc nâng cao giá trị cho cộng đồng:
Website được xây dựng với mục tiêu cung cấp kèo nhà cái hôm nay, tỷ lệ kèo nhà cái và tỷ lệ bóng đá trực tuyến nhanh, chính xác. Người dùng có thể dễ dàng theo dõi bảng kèo cũng như biến động tỷ lệ cá cược theo thời gian thực mà không gặp sai lệch thông tin.
Bên cạnh đó, nền tảng tập trung phát triển nội dung nhận định kèo nhà cái và giải mã kèo nhà cái, phân tích dựa trên dữ liệu thực tế để giúp người dùng có thêm cơ sở khi tham khảo kèo.
Định hướng phát triển của trang trong giai đoạn tới là xây dựng nền tảng chuyên nghiệp, mở rộng khả năng tiếp cận người dùng và tạo chiều sâu dữ liệu. Kèo nhà cái tập trung cải thiện tốc độ cập nhật, tăng tính chính xác của dữ liệu và mở rộng quy mô cộng đồng theo hướng bền vững.

Vào thời điểm nhiều giải đấu lớn cùng diễn ra, lượng truy cập vào website Kèo nhà cái thường tăng cao. Điều này có thể khiến tốc độ tải trang bị ảnh hưởng trong một số khung giờ cao điểm. Để theo dõi kèo nhà cái, tỷ lệ kèo bóng đá trực tuyến, lịch thi đấu và kết quả trận đấu mới nhất, người dùng nên ưu tiên truy cập đúng domain chính thức dưới đây.
Kèo nhà cái hiện đang duy trì hệ thống phát sóng và cập nhật dữ liệu đa dạng bao phủ nhiều giải đấu trên thế giới. Nội dung được chọn lọc dựa trên mức độ quan tâm của cộng đồng đảm bảo mỗi trận đều có đường truyền ổn định và thông tin kèm theo. Nhờ đó, người theo dõi dễ tiếp cận các trận tranh tài một cách liên tục mà không bị gián đoạn.
Các giải đấu châu Âu luôn chiếm tỷ trọng lớn trên hệ thống phát sóng cũng như nội dung của Kèo nhà cái. Lịch thi đấu được cập nhật chi tiết theo từng vòng tập trung nhiều vào giai đoạn cuối tuần và khung giờ tối. Tần suất cung cấp luôn duy trì ổn định nhằm đảm bảo người theo dõi không bỏ lỡ các trận cầu quan trọng.

Bên cạnh các giải châu Âu đầy kịch tính, Kèo nhà cái còn mở rộng phạm vi cập nhật thêm nhiều giải vô địch hấp dẫn tại nhiều khu vực khác châu Á, Mỹ, Úc. Các giải đấu được phân bổ hợp lý trong tuần tạo điều kiện theo dõi liên tục cho nhiều khung giờ khác nhau. Số lượng trận được cập nhật duy trì ở mức ổn định đi kèm lượng người theo dõi tăng đều qua từng mùa giải. Sự góp mặt của các giải đấu tiêu biểu giúp hệ thống nội dung trở nên phong phú và phù hợp với nhiều xu hướng lựa chọn kèo.
Futsal và bóng đá bãi biển được bổ sung nhằm đa dạng hóa nội dung theo dõi. Các trận đấu thuộc nhóm này thường có nhịp độ nhanh phù hợp với những người ưa thích các môn thể thao tốc độ. Tần suất phát sóng được duy trì ổn định đúng theo lịch trình chuẩn quốc tế.
keonhacai55.fund hiện vẫn đang duy trì vị thế trên thị trường nhờ hệ thống nhiều tiện ích hấp dẫn. Khi đến với website, bạn sẽ được tận hưởng nhiều tính năng hấp dẫn chưa từng có:
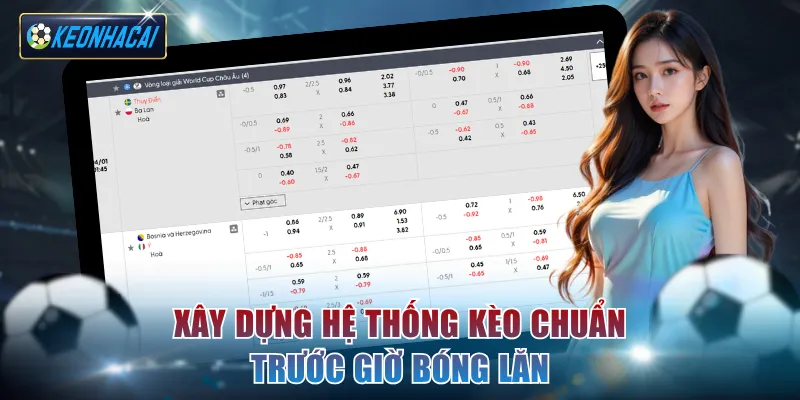
Kèo nhà cái tập trung cung cấp số lượng lớn kèo cược của hầu hết các giải đấu lớn nhỏ trên khắp hành tinh. Mọi biến động dù là nhỏ nhất của thị trường cũng được cập nhật tỷ lệ kèo nhà cái hôm nay đảm bảo dữ liệu luôn phản ánh chính xác tình hình trước giờ bóng lăn. Từng thay đổi tăng giảm đều được hiển thị rõ ràng giúp bạn dễ dàng theo dõi và nhận biết xu hướng. Quá trình đồng bộ dữ liệu trên hệ thống với các nguồn chính thống diễn ra nhanh và hạn chế tối đa độ trễ. Điều này tạo lợi thế giúp người dùng luôn cập nhật sát sao diễn biến kèo để đưa ra nhận định. Khi dữ liệu được đảm bảo chính xác, người dùng có thể tự tin trong việc xây dựng chiến lược đầu tư hiệu quả.
Kèo nhà cái phát sóng các trận đấu với hình ảnh rõ nét và ổn định thông qua đường link chất lượng. Những cuộc đối đầu có lượng người xem lớn đều được ưu tiên về đường truyền nhằm đảm bảo theo dõi diễn biến xuyên suốt, không bị gián đoạn. Hình ảnh chuẩn từng chi tiết kết hợp âm thanh rõ ràng giúp tái hiện chân thực không khí trên sân. Từng pha bóng, tình huống tranh chấp đều được quay cận cảnh hỗ trợ quá trình quan sát hiệu quả hơn. Trải nghiệm của người dùng nhờ đó trở nên mượt mà và có chiều sâu hơn so với nhiều nền tảng khác.
Đội ngũ bình luận viên tại Kèo nhà cái đều được tuyển chọn kỹ càng trước khi tham gia vào hệ thống. Nội dung bình luận bên cạnh việc bám sát diễn biến trận còn mang đến góc nhìn chuyên môn về chiến thuật và lối chơi của từng đội. Điều này giúp người xem có thêm cơ sở để đánh giá trận đấu một cách toàn diện. Phong cách bình luận đa dạng nhưng đều duy trì theo hướng mạch lạc, dễ hiểu, gần gũi. Người nghe có thể nắm bắt thông tin nhanh mà không bị rối bởi các chi tiết không cần thiết. Sự kết hợp giữa hình ảnh sắc nét và bình luận hấp dẫn tạo nên một trải nghiệm trọn vẹn và chuyên nghiệp hơn.
Kèo nhà cái luôn duy trì dòng tin tức liên tục xoay quanh từng đội bóng lớn, trận đấu và các giải. Thông tin được cập nhật chi tiết theo từng khung giờ phản ánh nhanh nhất những thay đổi về lực lượng, phong độ, chiến thuật,… Nhờ đó, bạn có thể dễ dàng nắm bắt được những yếu tố có thể ảnh hưởng đến sự thay đổi tỷ lệ kèo. Các nội dung tin tức về kèo bóng đá trực tuyến đều được chọn lọc kỹ lưỡng từ các nguồn chính thống nên đảm bảo độ chính xác và có giá trị tham khảo cao. Người dùng hoàn toàn có thể dựa vào các thông tin này để điều chỉnh góc nhìn và đánh giá trận đấu có cơ sở hơn.

Bảng xếp hạng là yếu tố được Kèo nhà cái cập nhật liên tục dựa theo kết quả thi đấu mới nhất của các đội. Mỗi sự thay đổi về vị trí đều được đưa ra chính xác theo từng diễn biến trong trận phản ánh trực tiếp phong độ của mỗi bên. Người theo dõi có thể dễ dàng nhận diện được những đội đang sa sút hay đang lên cao.
Lịch thi đấu được keonhacai55.fund sắp xếp khoa học theo ngày cụ thể của nhiều giải đấu như Ngoại Hạng Anh, C1, La Liga,…. Bạn có thể dễ dàng tìm kiếm trận đấu mong muốn mà không mất quá nhiều thời gian. Thông tin chi tiết ngày giờ và cặp đấu luôn được cập nhật đầy đủ trước khi giải diễn ra nhiều ngày. Thông tin này còn giúp người xem chủ động hơn trong việc sắp xếp thời gian theo dõi. Những trận cầu quan trọng dễ dàng theo dõi đúng thời điểm mà không bị bỏ lỡ.
Không chỉ cung cấp tỷ số hôm nay, hệ thống còn lưu trữ kho dữ liệu kết quả bóng đá từ nhiều mùa giải trước. Điều này giúp cộng đồng keonhacai dễ dàng thống kê phong độ, phân tích lịch sử đối đầu để soi kèo nhà cái hôm nay một cách chuẩn xác nhất. Mọi bảng kết quả đều được trình bày khoa học, tích hợp bộ lọc theo ngày và giải đấu giúp việc tra cứu trở nên đơn giản và tiện lợi.
Kèo nhà cái tích hợp nhiều công cụ hỗ trợ nhằm tối ưu trải nghiệm người dùng khi theo dõi trận đấu. Để không bỏ lỡ bất kỳ diễn biến nào, bạn có thể sử dụng tính năng Livescore hệ thống cập nhật tỷ số trực tuyến thần tốc giúp bạn nắm bắt kết quả trận đấu theo từng giây.

Trang kèo nhà cái cũng liên tục cung cấp các bài nhận định bóng đá chuyên sâu dựa theo dữ liệu thực tế và thống kê chi tiết của từng trận đấu. Nội dung tập trung vào phong độ, quá khứ chạm trán và chiến thuật thi đấu của các đội. Người theo dõi có thể sử dụng ngay thông tin này như nguồn tham khảo đáng tin cậy. Các bài viết được trình bày theo cấu trúc rõ ràng, logic giúp người đọc dễ dàng tiếp nhận và tổng hợp thông tin. Nội dung bám sát dữ liệu, hạn chế các yếu tố cảm tính nên trở thành cơ sở nhận định kèo bóng đá chính xác cho nhiều người trong từng trận đấu.
Trên hệ thống keo nha cai 5, người chơi có thể cập nhật rất nhiều dạng tỷ lệ cá cược khác nhau đáp ứng nhu cầu theo dõi và phân tích ở nhiều cấp độ khác nhau. Mỗi loại kèo đều có đặc điểm riêng, phù hợp với từng phong cách đánh giá trận đấu và cách tiếp cận dữ liệu:
Cược chấp hay kèo châu Á, Handicap là loại hình xuất hiện ở bảng kèo của mọi trận đấu bóng đá trên hệ thống. Các nền tảng trực tuyến đều sẽ dựa trên sự chênh lệch giữa các đội bóng và nhiều yếu tố liên quan để cung cấp tỷ lệ phù hợp. Chỉ số này thể hiện đội mạnh hơn (cửa trên) chấp đối thủ còn lại (cửa dưới) số bàn thắng nhất định. Bạn có thể tham khảo ví dụ dưới đây để hiểu hơn về loại hình hấp dẫn này. Cuộc chạm trán giữa Brentford vs Everton được cung cấp cược chấp (ô màu đỏ) với những thông tin cụ thể như sau:
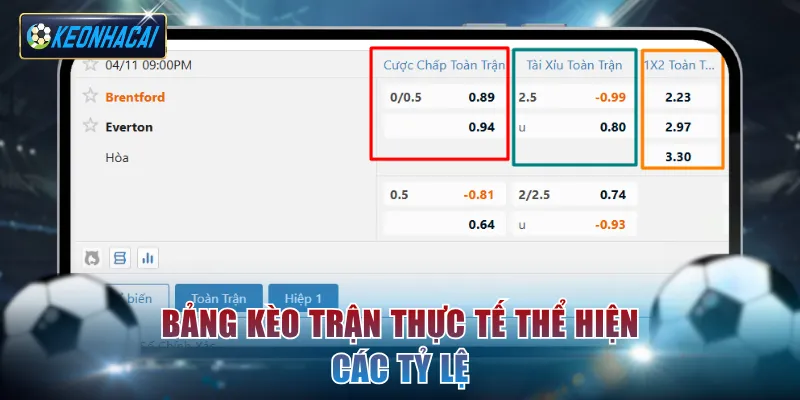
Cược Tài Xỉu trên bảng kèo chính sẽ dựa trên căn cứ tổng số bàn thắng được hai đội ghi ở hiệp 1 hoặc cả trận. Kèo nhà cái cung cấp một mốc cụ thể và người chơi sẽ đặt tiền vào 1 trong 2 cửa:
Bảng kèo phía trên được nền tảng cung cấp tỷ lệ kèo Tài Xỉu (ô màu xanh) với những thông tin cụ thể như sau:
Cược 1×2 hay kèo châu Âu dù là loại hình đơn giản nhưng lại có mặt ở tất cả các cuộc đối đầu khác nhau trên Kèo nhà cái. Người chơi chỉ cần vào tiền cho 1 trong 3 lựa chọn sau đây:
Theo bảng kèo thực tế phía trên, người chơi có thể cập nhật kèo 1×2 thông qua các chỉ số như sau:

Bên cạnh ba hình thức chính được Kèo nhà cái cung cấp trên đây, người chơi còn có thể cập nhật thêm nhiều loại kèo phụ hấp dẫn sau đây:
Quy trình tham khảo thông tin trên Kèo nhà cái được thiết kế với các bước đơn giản, dễ thao tác. Bạn chỉ cần làm quen với tiến trình sau là có thể bắt đầu trải nghiệm tuyệt vời tại trang:
Kèo nhà cái xây dựng hệ thống nội dung và phát sóng theo hướng tối ưu trải nghiệm người dùng, giúp việc soi kèo bóng đá trở nên nhanh chóng và thuận tiện hơn. Khi đặt cạnh các nền tảng khác trên thị trường, sự khác biệt thể hiện rõ qua độ chính xác của dữ liệu, tốc độ cập nhật và khả năng hiển thị thông tin, từ đó làm nổi bật những ưu điểm về chất lượng và độ tin cậy của nền tảng.

Kèo nhà cái được nhiều người tìm đến với mong muốn nhận được các nguồn thông tin chất lượng. Nếu bạn lần đầu theo dõi thì có thể tham khảo thêm giải đáp chi tiết cho những thắc mắc phổ biến dưới đây:
Kèo nhà cái phát sóng toàn bộ trận đấu và dữ liệu dưới hình thức truy cập tự do. Người dùng có thể theo dõi bất kỳ thông tin nào trên trang mà không cần phải trả phí hay đăng ký tài khoản. Yếu tố tạo điều kiện cho việc theo dõi thông tin không bị gián đoạn.
Kèo nhà cái cho phép người dùng chia sẻ các trận đấu, video, tin tức bằng cách gửi liên kết đến cho bạn bè. Tuy nhiên, nếu bạn đăng thông tin lên trang khác cần ghi rõ nguồn nhằm đảm nguyên tắc bảo vệ bản quyền của nền tảng.

Kèo nhà cái cung cấp thanh công cụ tìm kiếm giúp truy xuất thông tin nhanh chóng. Người dùng chỉ cần nhập tên đội bóng hoặc giải đấu là có thể hiển thị ngay kết quả trong vòng 2 giây. Bên cạnh đó, bạn cũng có thể sử dụng bộ lọc để thu hẹp phạm vi giúp quá trình tiếp cận dữ liệu nhanh chóng hơn.
Kèo nhà cái cung cấp dữ liệu khách quan về tỷ lệ kèo cũng như các thống kê liên quan. Từ đó, trang đưa ra những gợi ý về lựa chọn tiềm năng có khả năng thắng cao. Tuy nhiên, mọi quyết định cuối cùng vẫn thuộc về phía người chơi trong việc đặt cược.
Tất cả các chỉ số trong bảng kèo nhà cái được xây dựng dựa trên quá trình phân tích dữ liệu liên quan đến từng trận đấu. Đội ngũ chuyên gia kết hợp thông tin về phong độ, lực lượng, lịch sử đối đầu cùng các bảng thống kê và thuật toán xác suất để hình thành tỷ lệ kèo nhà cái với độ chính xác cao.
Biến động tỷ lệ cá cược là dấu hiệu quan trọng giúp người chơi nhận diện xu hướng thị trường khi theo dõi tỷ lệ kèo nhà cái. Nhờ đó, bạn có thể đánh giá chính xác hơn cửa cược đang chiếm ưu thế ở từng thời điểm.

Người dùng có thể dễ dàng truy cập Kèo nhà cái thông qua thiết bị di động vào bất cứ thời điểm nào. Giao diện được rút gọn theo đúng kích cỡ và vẫn đủ các tính năng giúp bạn theo dõi dễ dàng ở mọi nơi.
Kèo nhà cái chỉ cung cấp tỷ lệ kèo và nội dung phân tích dựa trên dữ liệu thực tế từ các nguồn uy tín. Người dùng không thể trực tiếp đặt cược trên website mà chỉ sử dụng thông tin để tham khảo
Đây là hai khái niệm hoàn toàn khác nhau mà người chơi mới có thể nhầm lẫn:
Tất cả nhận định của Kèo nhà cái đều dựa trên các thông tin liên quan đến trận đấu. Tuy nhiên, kết quả cuối cùng có thể xuất hiện nhiều bất ngờ không thể lường trước. Vì vậy, người chơi không nên phụ thuộc 100% vào dự đoán của trang mà cần phải tự mình phân tích và tự tin vào lựa chọn.
Kèo nhà cái hiện tại đã trở thành địa chỉ đáng tin cậy được nhiều người tin tưởng truy cập và theo dõi. Bạn giờ đây vừa có thể theo dõi trực tiếp các trận đấu cũng như tham khảo được nhiều thông tin hữu ích trên một chuyên trang vô cùng tiện lợi. Hãy truy cập trang thường xuyên để nhận về những dữ liệu mới nhất thỏa mãn đam mê môn thể thao Vua mọi lúc.
Gửi đánh giá của bạn

Soi kèo phạt góc dựa trên phân tích dữ liệu nhịp trận và thống kê [...]

Kèo chấp trở thành lựa chọn thịnh hành hàng đầu giúp cuộc tranh tài được [...]
Kèo rung (Running Odds) hiện đang là thỏi nam châm thu hút mọi tay chơi [...]

Cùng giải mã kèo Penalty để cảm nhận sự hồi hộp tột độ và nắm [...]

Soi kèo châu Á là thao tác cần thiết để người chơi cá cược bóng [...]
Soi kèo châu Âu là thao tác cần thiết để dự đoán kết quả cược [...]


